The Artifact Blog
Making An ARTIFACT Workshop Apron
Above is a video link of our ARTIFACT studio while we make our sturdy workshop aprons. Sewing though layers of leather, canvas, and denim requires industrial sewing equipment and experience. Our studio resides on three floors of a smallish 130-year-old building with personality. It was originally built by a family who sold cast iron stoves. It even had a tin shop in the basement. Good bones. Admittedly, there are tradeoffs between efficiency and aesthetic in a workspace, but creativity thrives in a creative environment. It mustn't be choked.
Below are more images of our gear with explanations about each piece and process. Let us know if you want to learn more about our studio, our process, and our principles of: quality, utility, and timeless design.

We start by loading a roll of material on our fabric spreader. It has wheels that follow a channel on the side of our cutting table. We stack up tidy layers then mark the top layer with our pattern templates. The heavy steel bar fabric weights (pictured) help secure the material.

We arrange apron pattern templates into a layout, then mark the material to cut. We are in the process of incorporating a large plotter printer so can print a file of our layout onto paper rather than transferring it onto the material every time. For large cuts, we use our Eastman "Straight Knife" cutter. It's crazy how smooth this machine works, which is why we wear our stainless steel mesh shark petting glove when we operate it. For samples we use a small rotary blade Eastman Chickadee. We burned through at least two cheap clones of this cutter before upgrading to the Eastman version.
After cutting, the stacks of apron pattern pieces are brought upstairs to main floor sewing studio and distributed among our team. Industrial sewing machines are different from household machines because they are more powerful and they are typically set up for one action. Several different sewing machines are needed to make our workshop apron.
 We typically use "walking foot" machines because they have a high foot lift that can travel over thick layers. Most of our machines have custom-made folders for rolled hems. Some have drop-down guides for top stitching like the one pictured above.

We also use double needle machines that sews two lines of stitching simultaneously. This machine is a needle feed, which we found works better on workshop apron pockets than our walking foot double needle machines.

We use a bartack machine to reinforce the center of the lower pocket on our denim workshop aprons. A bartack stitch can also be found on the belt loops of your jeans. This particular machine is made by Brother and is programmable. It can be set up to do a lot of different actions like eyelets, box "x", line tack, etc.
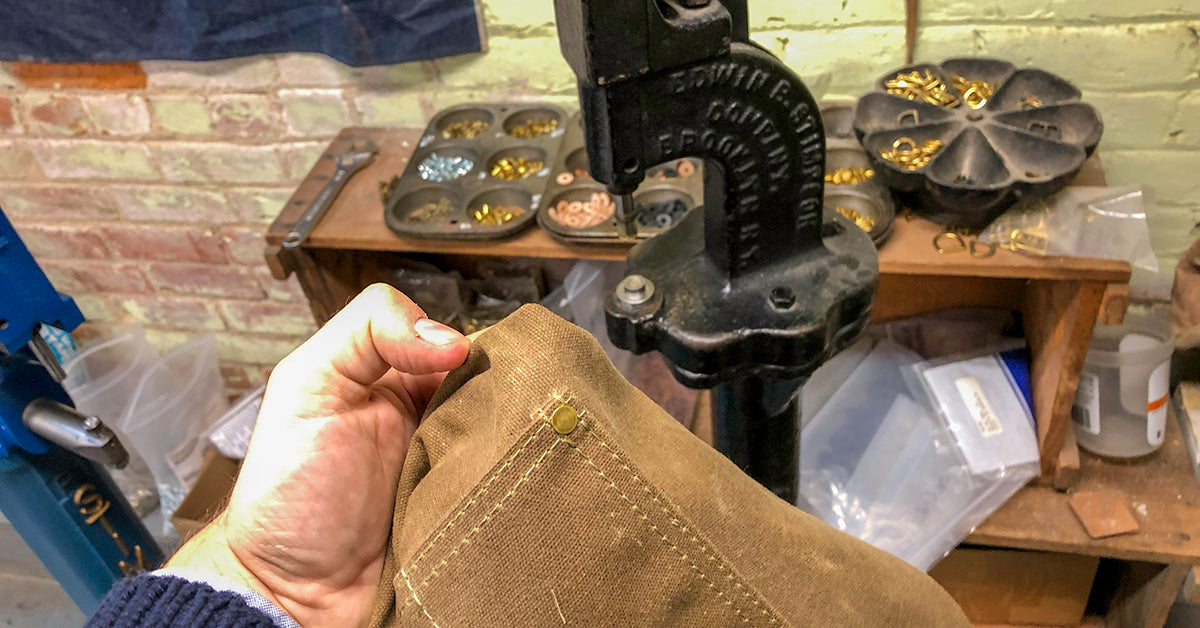 Our workshop aprons have tubular solid brass rivets and caps to reinforce the lower pocket. We use this antique foot operated "kick leg" press with custom dies for setting this rivet. I love the look of it.

Our No.325Y Leather "Y-Strap" Workshop Apron has hand hammered solid copper rivets securing the straps. They are set using this well used anvil and Plumb ball peen hammer. Thousands of apron and bag rivets have been hammered here with this setup.
Our workshop aprons with cotton ties use a solid brass grommet set with this foot operated setting machine. It has a laser guide and is pretty turbo in comparison to our other machines. I am not a fan that it's painted white with royal blue accents. I'm trying to live with it, or at least squint when I am near the machine.

Our No.325H Removable Leather Strap workshop Apron uses a vintage "tack button" as seen on vintage denim workwear and WWII military fatigues. It's called a tack button because the button's back looks like a two pronged tack. The tines get rolled over inside the barrel of the button with the help of pressure from our press. In the early days, I had only one "kick leg" Stimpson press. I would switch out my setting dies when doing ring snaps, lift-the-dot snaps, truss rivets, tubular rivets, grommets, etc. Every time I did this, I has to reset the stroke height. It drove me crazy constantly fiddling with my allen wrenches. I allowed myself to start hoarding presses so I could have a dedicated press for every button / rivet / grommet we used. You have to walk before you can run but you also have to know when your process is holding you back and shaving years off your life!
Thanks for nerding out with me about our equipment. Let me know if you have questions in the comment section below.

